How to Transform Yourself into a Pixar Character with Stable Diffusion AI
Written on
Chapter 1: Introduction to Stable Diffusion AI
If you've ever dreamed of resembling Woody, Buzz Lightyear, or even Nemo, Stable Diffusion can help you achieve that vision. This advanced text-to-image diffusion model allows you to create an image of yourself as any Pixar character by simply entering a text prompt.
In this guide, I will walk you through the steps to run Stable Diffusion on your local machine and explore the exciting capabilities of this AI model for free.
What You Will Need
- An Nvidia GPU with a minimum of 4GB VRAM
- Stable Diffusion Web UI — Obtain this from GitHub
- Stable Diffusion v1.5 checkpoint file — Downloadable via Hugging Face
- A portrait photo of yourself
Setting Up Your Environment
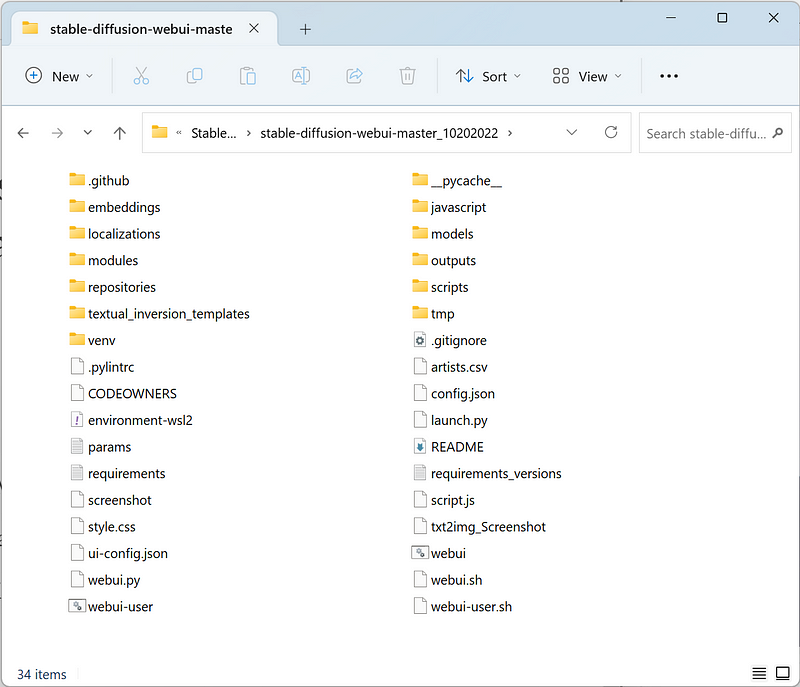
First, extract the downloaded Stable Diffusion project file onto your local drive. Your file structure should resemble this:

Next, rename the checkpoint file to “model.ckpt” and move it to the modelsStable-diffusion directory.
Then, double-click the “webui-user.bat” file in the command prompt.
If you encounter a "Python not found" error, ensure you have specified the path to python.exe within the webui-user.bat file.
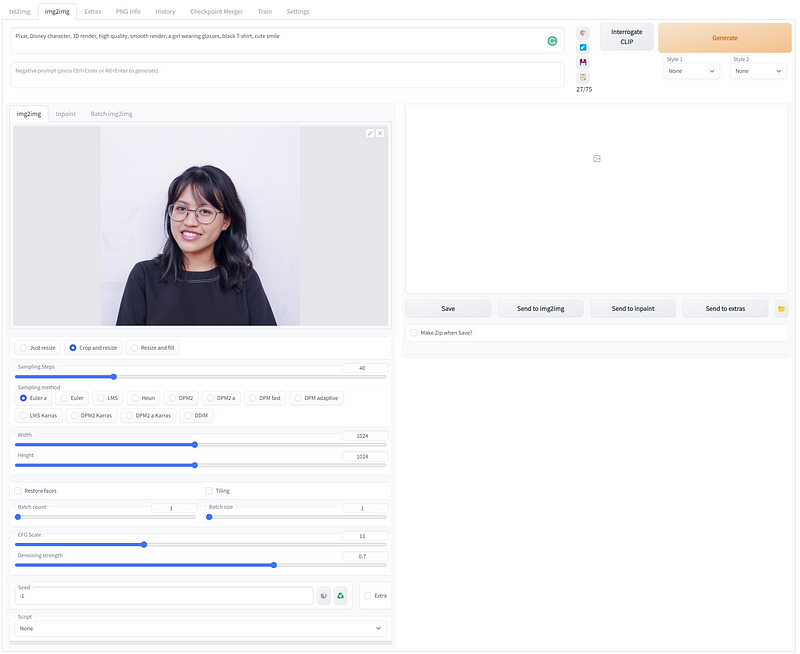
After this, launch your Chrome browser and navigate to http://127.0.0.1:7860/ to open the Gradio UI, which should look similar to this:

Generating Your Image
Under the “img2img” tab, upload your photo and adjust the settings based on your hardware capabilities.

For instance, I am using an Nvidia RTX3060 Ti with 8GB of VRAM, allowing me to set a maximum resolution of 1024x1024.
Use the following prompt as a baseline, making adjustments to reflect your image's specifics: "Pixar, Disney character, 3D render, high quality, smooth render, a girl wearing glasses, black T-shirt, cute smile."
It’s important to remember that both the Classifier Free Guidance (CFG) scale and Denoising strength significantly influence the final output. Increasing the Denoising value results in an image that diverges from the original reference. Conversely, a higher CFG scale directs the AI to adhere more closely to your prompt, which may sometimes introduce visual irregularities.
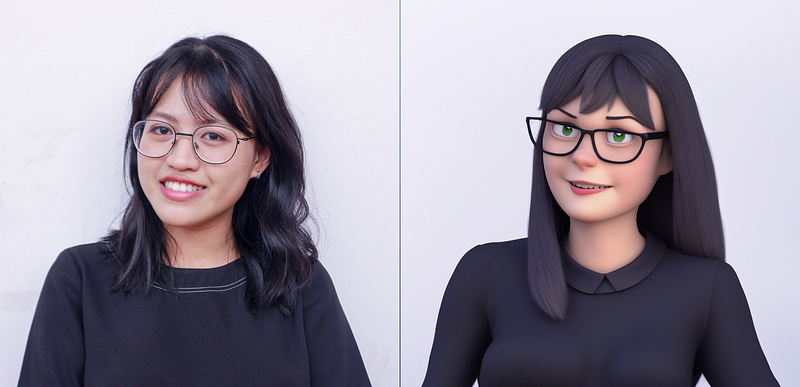
For this demonstration, I found that a Denoise strength of 0.7 and a CFG scale of 11.0 yielded the best results. Below is the final image juxtaposed with the original reference:

Conclusion
That’s all there is to it! What are your thoughts on this experiment? Keep in mind, the AI isn't restricted to human subjects; you can also transform images of pets or other objects. The possibilities are virtually limitless. Enjoy experimenting with Stable Diffusion and let’s anticipate the remarkable developments it may bring in the future.
Mlearning.ai Submission Suggestions How to become a writer on Mlearning.ai